Introduction:
A well-maintained gas burner not only ensures efficient cooking but also helps prevent potential safety hazards. Regular cleaning of your gas burner is essential to remove grease, food debris, and carbon buildup. In this article, we will guide you through a simple step-by-step process to clean your gas burner effectively at home, ensuring optimal performance and a safer cooking experience.
Materials Needed:
- Dishwashing liquid
- Baking soda
- Vinegar
- A toothbrush or small brush
- Soft cloths or paper towels
- Ziplock bags (optional)

Step-by-Step Guide:
Step 1: Safety First
Before you start cleaning your gas burner, make sure to turn off the gas supply and allow the burner to cool down completely. Disconnect the gas burner unit from the gas line if possible, or ensure that the gas supply valve is shut off.

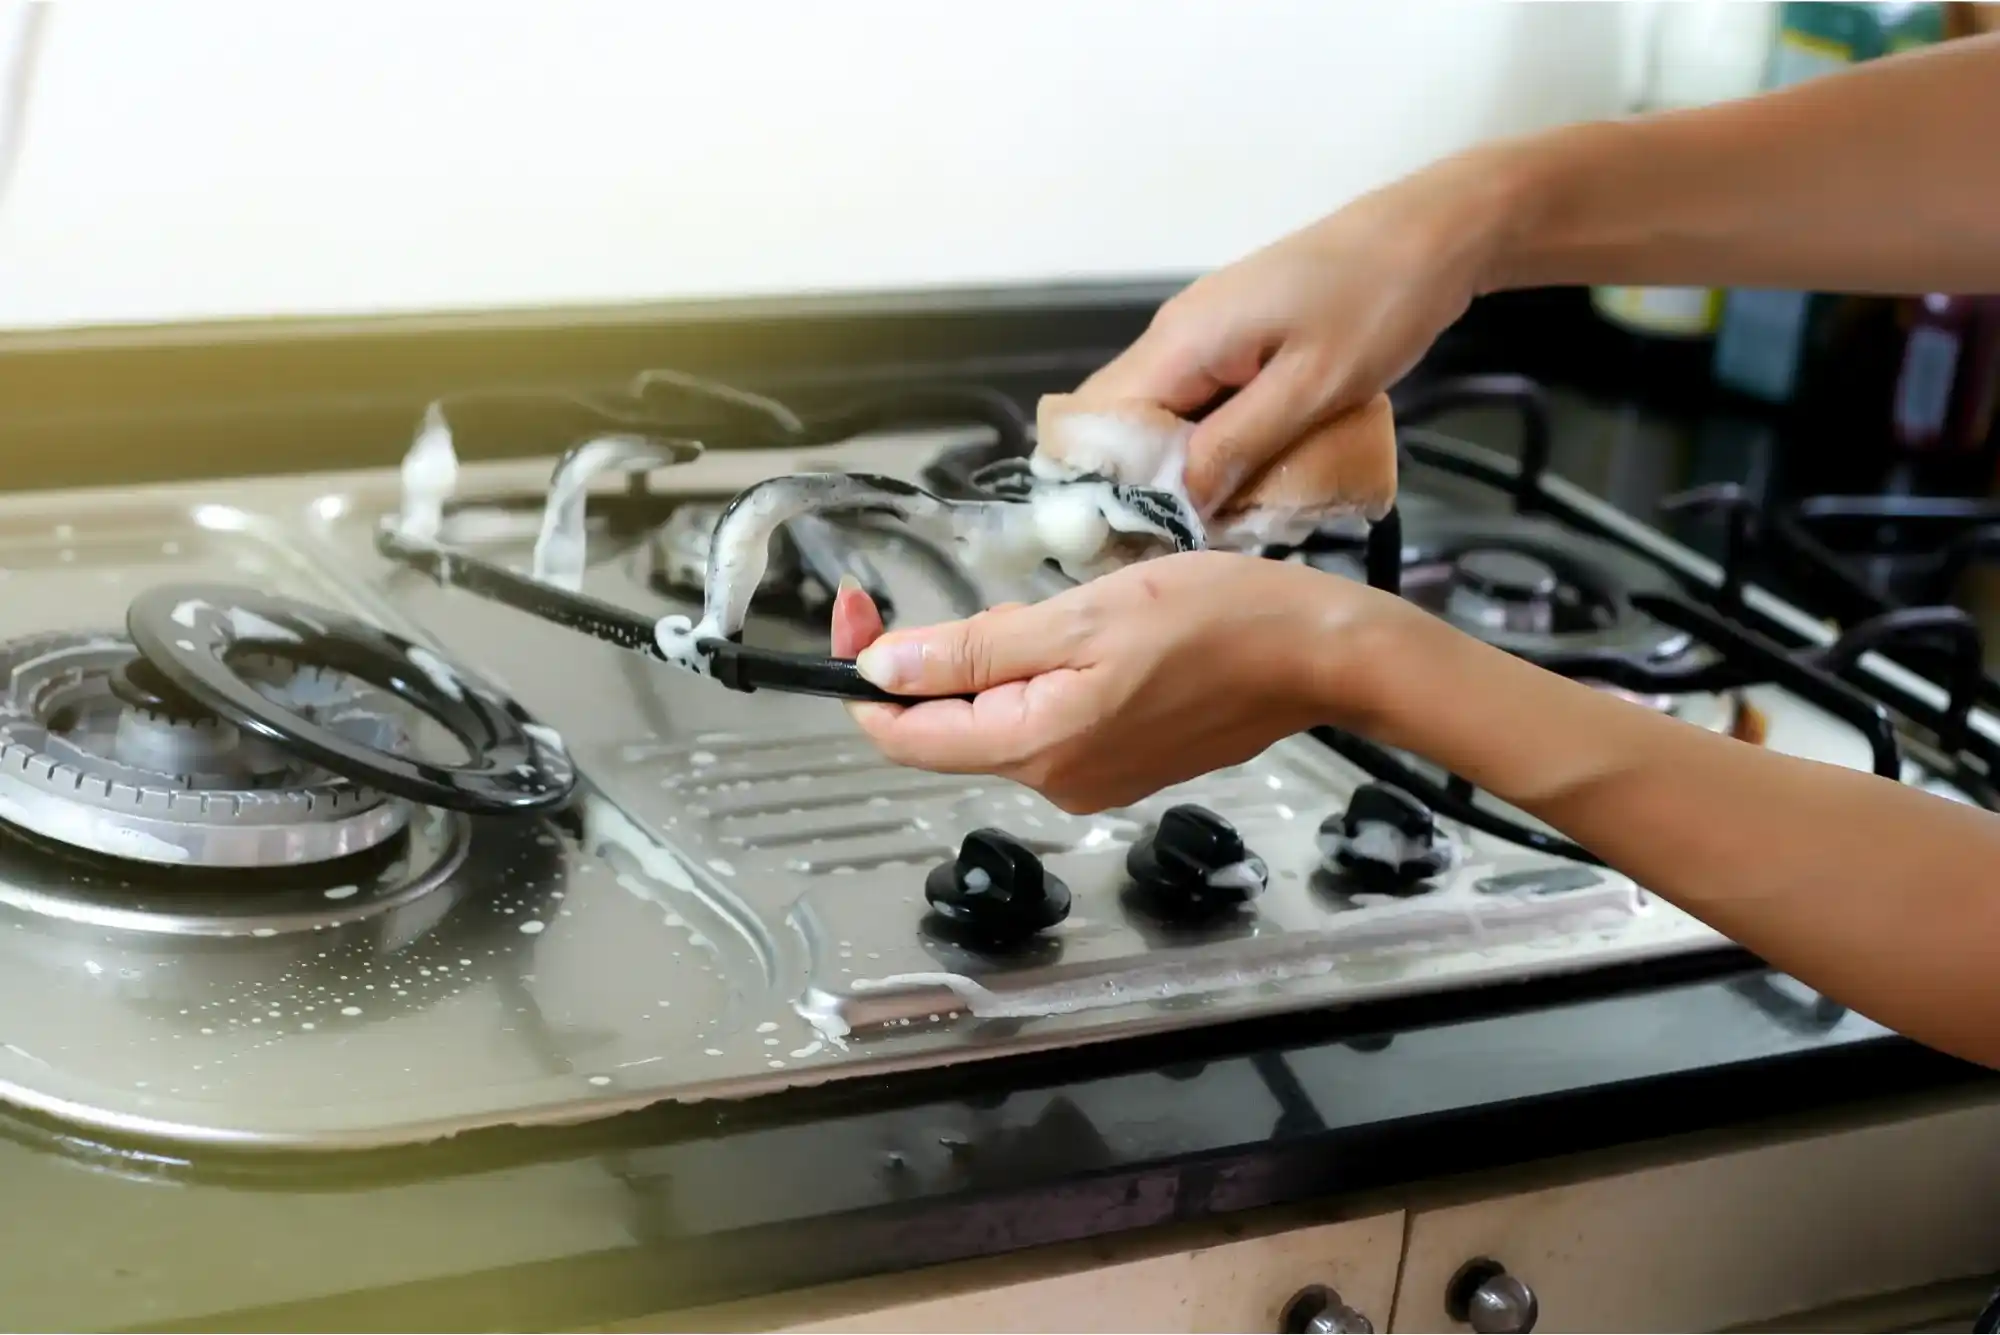
Step 2: Remove the Burner Cap and Grates
Carefully detach the burner cap and grates from the gas burner unit. Soak them in warm, soapy water for about 15-20 minutes. This will help loosen the stubborn grime, making it easier to clean later.
Step 3: Wipe the Surface
Using a soft cloth or paper towel, wipe the surface of the gas burner to remove any loose debris or spills. Be gentle while doing this, ensuring not to scratch the surface.
Step 4: Clean the Burner Cap and Grates
After soaking, take the burner cap and grates out of the soapy water. Use a toothbrush or a small brush to scrub away any remaining residue. For tougher stains, sprinkle baking soda on the brush before scrubbing. Rinse the burner cap and grates thoroughly under running water and pat them dry with a clean cloth.
Step 5: Dealing with Stubborn Stains
For more stubborn stains or burnt-on food particles, create a cleaning solution by mixing equal parts of baking soda and vinegar. Apply this mixture to the affected areas, and let it sit for about 10-15 minutes. Then, gently scrub away the stains with a toothbrush or soft brush. Rinse with water and wipe dry.
Step 6: Clean the Gas Burner Holes
Using a soft brush or a toothpick, carefully clean the gas burner’s holes to ensure smooth gas flow. Be cautious not to damage the burner holes during this process.
Step 7: Clean the Drip Pans (if applicable)
If your gas burner unit has drip pans, remove them and wash them separately with warm, soapy water. Scrub off any stubborn stains and food residues. Rinse thoroughly and let them dry before placing them back.
Step 8: Reassemble the Gas Burner
Once all the components are clean and dry, reassemble the gas burner, ensuring each part is correctly placed. Check that the burner cap and grates fit snugly.
Step 9: Clean the External Surfaces
Clean the external surfaces of the gas burner unit with a damp cloth to remove any grease or stains. Wipe dry for a polished look.
One more thing we have multi-language managing and cleaning staff, so you care to want to talk in Arabic for cleaning (شركة تنظيف في دبي, شركة تنظيف ابو ظبي, شركة تنظيف في الشارقة, شركة تنظيف في عجمان), or You can also discuss with us in English for all kinds of cleaning purposes just check out the page (Cleaning Services Dubai, Cleaning Services Abu Dhabi, Cleaning Services Sharjah, Cleaning Services Ajman). So you can use all those attached links to get in touch with your local locations around the UAE.
HERE IS THE LIST OF OUR ALL SERVICES:
- Pest Control Dubai
- Pest Control Abu Dhabi
- Pest Control Sharjah
- Pest Control Ajman
- Maid Cleaning Services Dubai
- Maid Cleaning Services Abu Dhabi
- Maid Cleaning Services Sharjah
- Maid Cleaning Services Ajman
- Cleaning Deal Dubai
- 25-50 Dhs Per Hour Cleaning Services Abu Dhabi
- Home Cleaning Services Dubai
- Deep Cleaning Services Abu Dhabi
- Sofa Cleaning Service In Dubai
- Carpet Cleaning Abu Dhabi
- Carpet Cleaning Services In Dubai
- Villa Deep Cleaning Services Dubai
- Car Deep Cleaning Dubai
- Deep Cleaning Services Dubai
- 20-45 dhs Per hour Cleaning Services Dubai
- Villa Cleaning in Dubai
- Cleaning Services Dubai Discovery Gardens
- Cleaning Services Dubai jlt
- Cleaning Company in International City Dubai
- Cleaning Services Company Dubai Silicon Oasis
- Cleaning Company Dubai Business Bay
- مكافحة الحشرات في دبي
- مكافحة الحشرات في ابوظبي
- مكافحة الحشرات في الشارقة
- مكافحة الحشرات عجمان
- تنظيف بالساعة
Conclusion:
Regularly cleaning your gas burner is a crucial aspect of maintaining its efficiency and safety. By following this simple step-by-step guide, you can easily keep your gas burner in top-notch condition, ensuring delightful cooking experiences and enhanced durability. Remember to perform this cleaning routine at least once a month or more frequently if needed. Happy cooking!